Menus
To customize the display of your site's navigation menus in WordPress, you can adjust settings for both the main menu and dropdown menu through the Appearance > Customize > Menus section.
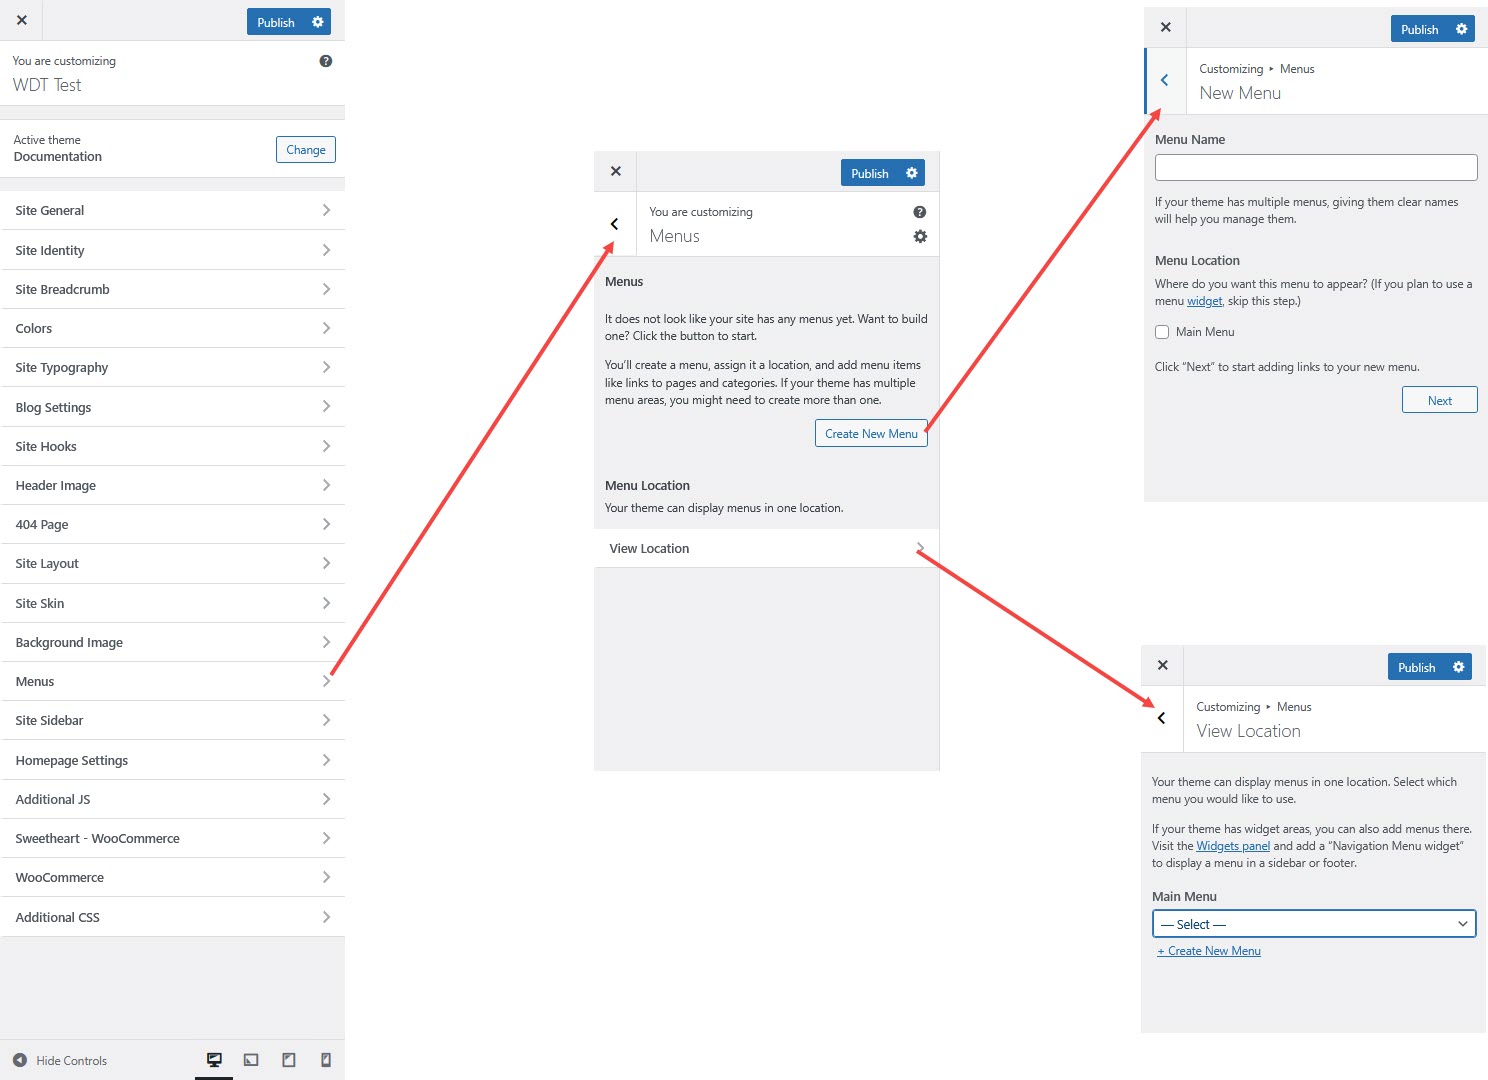
Here's a short form of the Menus settings process
Step 1 : Login to your WordPress admin dashboard.
Step 2 : Go to Appearance > Customize > Menu.
Step 3 : Select Site Menu
You can either edit an existing menu or create a new one.
Add or remove menu items and rearrange them as needed.
Step 4 : Assign the menu to the desired location.
Step 5 : Click Publish to save your changes.
Main Menu and Sub Menu Customization:
Main Menu:
Create New Menus
Click "Create New Menu" to start a new navigation menu.
Give it a name and assign it to a display location (e.g., Primary Menu, Footer Menu, Off-Canvas Menu).
Add Menu Items
Add pages, posts, custom links, categories, tags, or WooCommerce pages to your menu.
Use the “Add Items” button to select what appears in the menu.
Reorder Items
Drag and drop menu items to reorder them or nest them as submenus (dropdowns).
Assign Display Locations
Assign menus to specific theme locations (e.g., Primary, Secondary, Footer, Mobile).
View Live Preview
As you edit your menus, you see a live preview on the right side.
Sub Menu
In the Main Menu section, manage submenus by arranging them as dropdowns.
Customize their appearance to match your site’s style.
Mega Menu Option:
You can enable and customize Mega Menus to create a more complex and visually appealing menu layout
Mega Menus allow you to display multiple columns of links, images, or even widgets, offering a richer and more organized navigation experience