Site Sidebar
Site Sidebars are areas in your theme where you can place widgets to display content such as menus, search bars, recent posts, archives, categories, and more.
Here's a short form of the Site Sidebar settings process
Step 1 : Login to your WordPress admin dashboard.
Step 2 : Go to Appearance > Customize > Site Sidebars
Step 3 : Choose the global or custom sidebar settings you want to adjust.
Step 4 : Add or manage widgets through Appearance > Widgets.
Step 5 : Save and publish your changes.
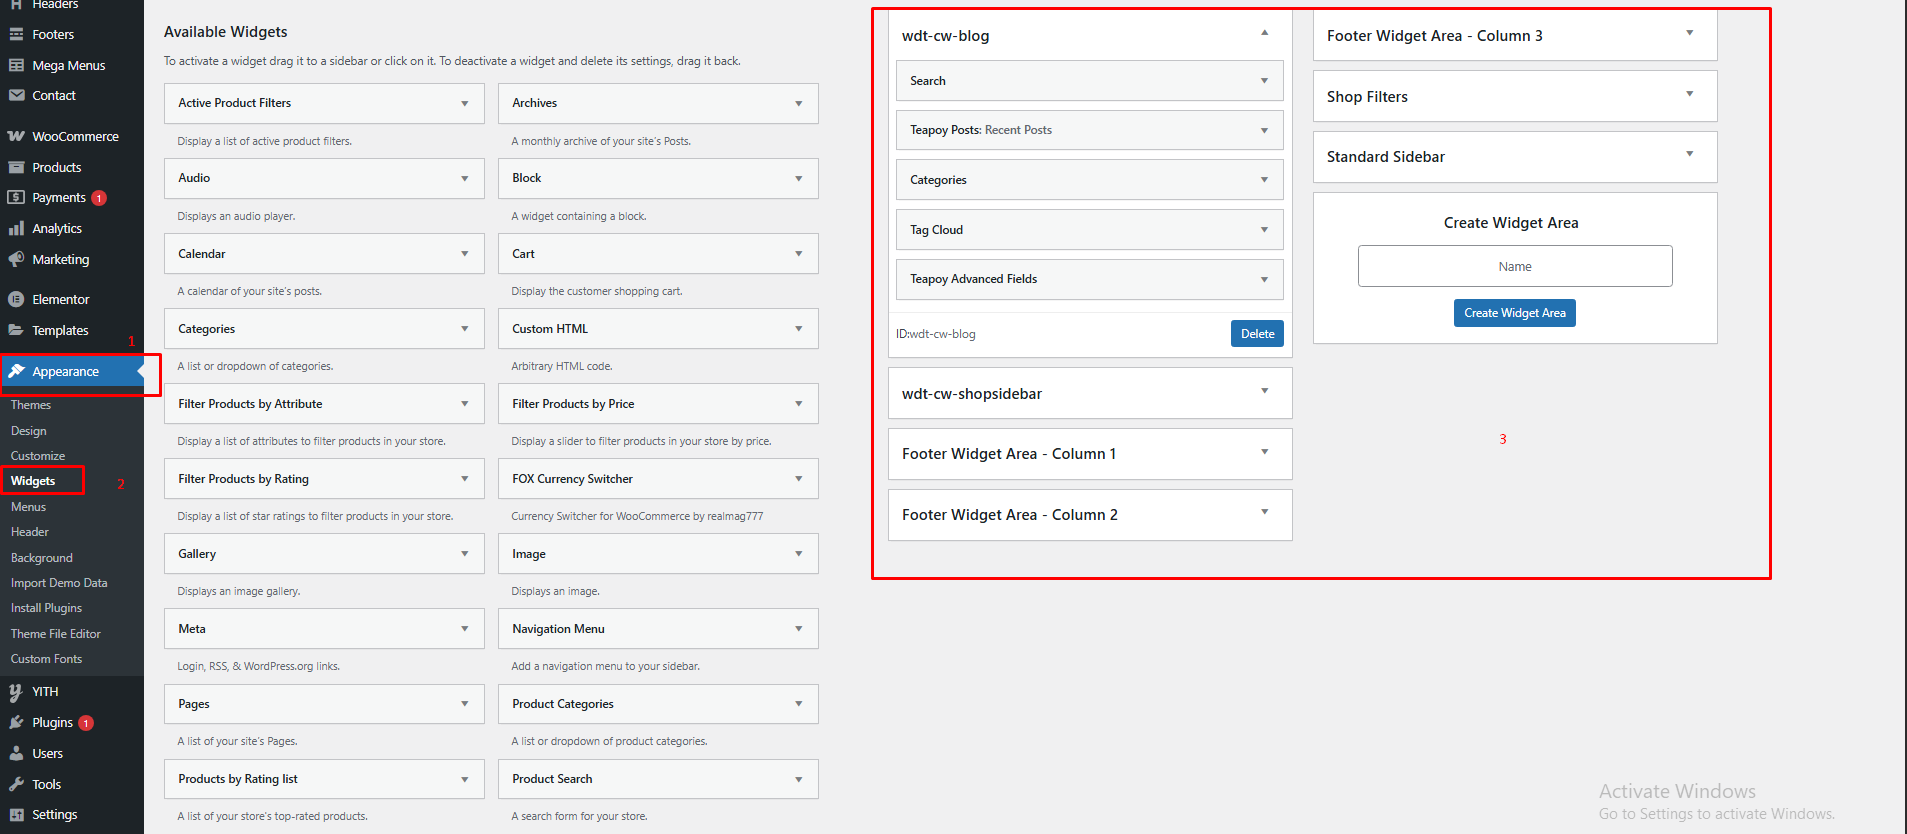
Adding and Managing Widgets:
Go to Appearance > Widgets or Appearance > Customize > Widgets.
Add widgets to the sidebar area by dragging them from the available widgets list.
Customize each widget to display content like recent posts, categories, archives, search bars, etc.
Sidebar Settings
The Site Sidebar allows you to manage widget areas and customize the sidebar layout across your website.
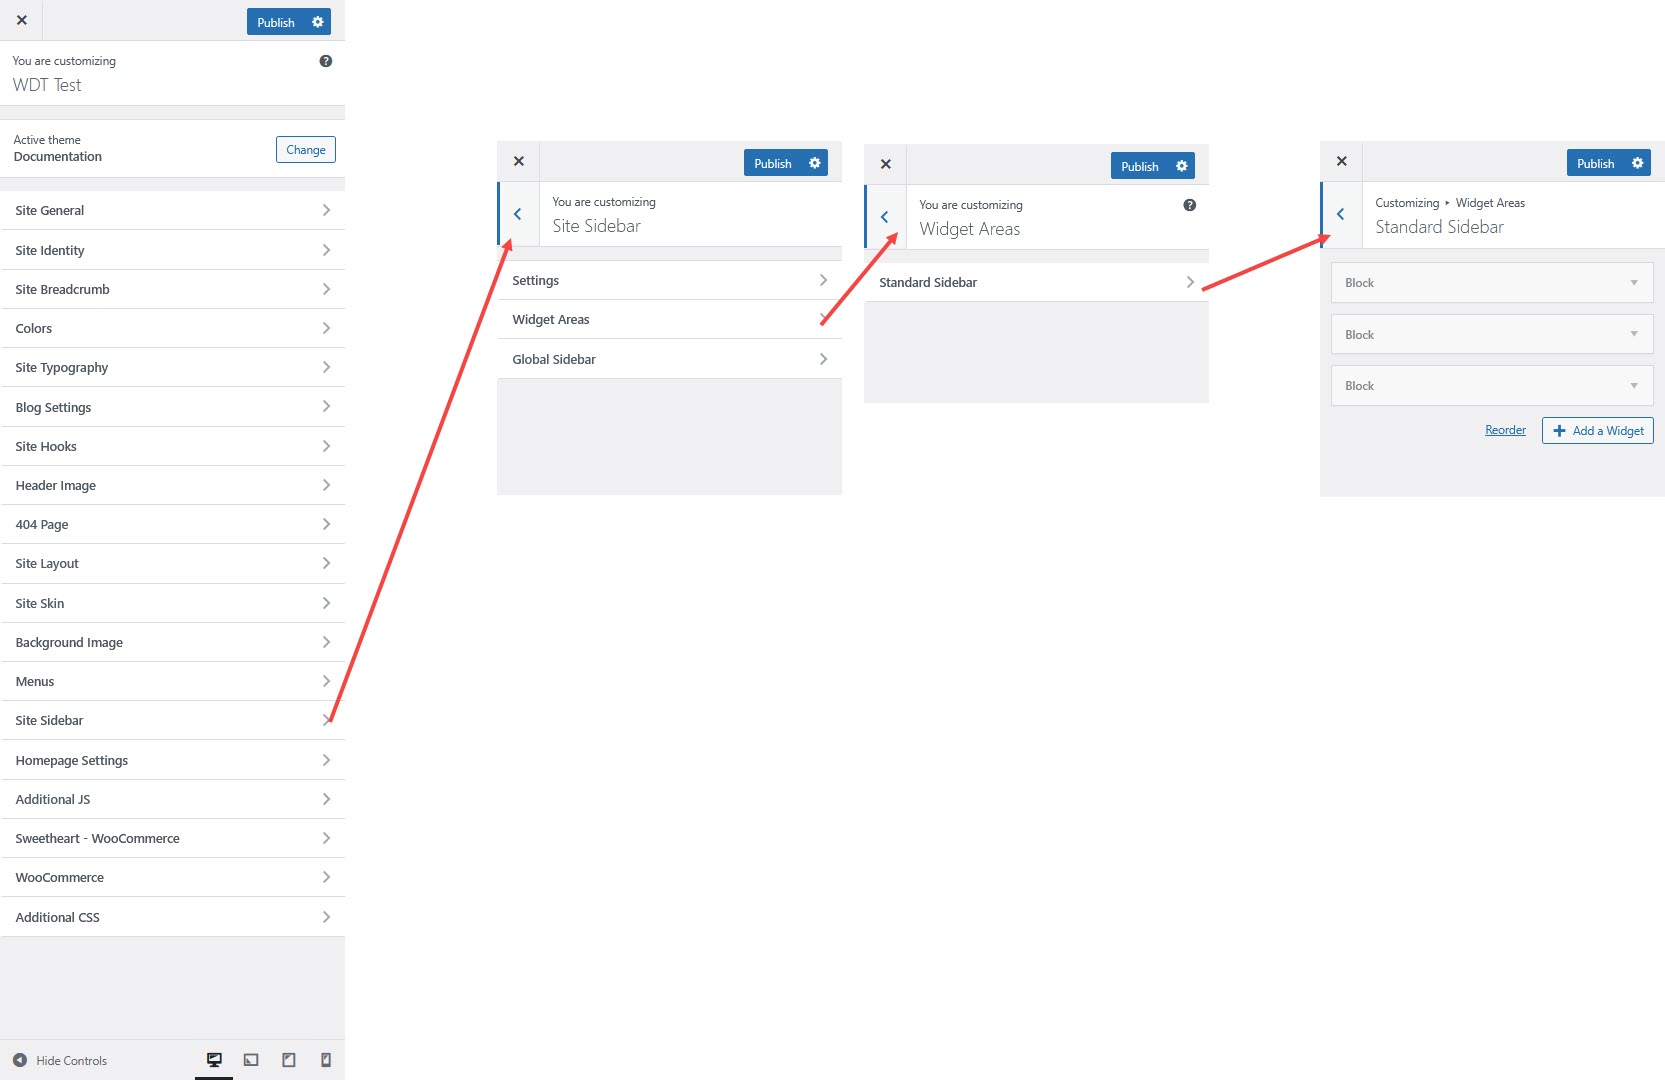
Widget Areas
Global Sidebar – This is the default sidebar used across your website unless overridden by page-specific settings.
Customizing Sidebar Settings
Global Sidebar Settings
Global Sidebar Layout – Choose the default layout for the sidebar.
Hide Standard Sidebar – Enable this option to remove the sidebar from all pages.
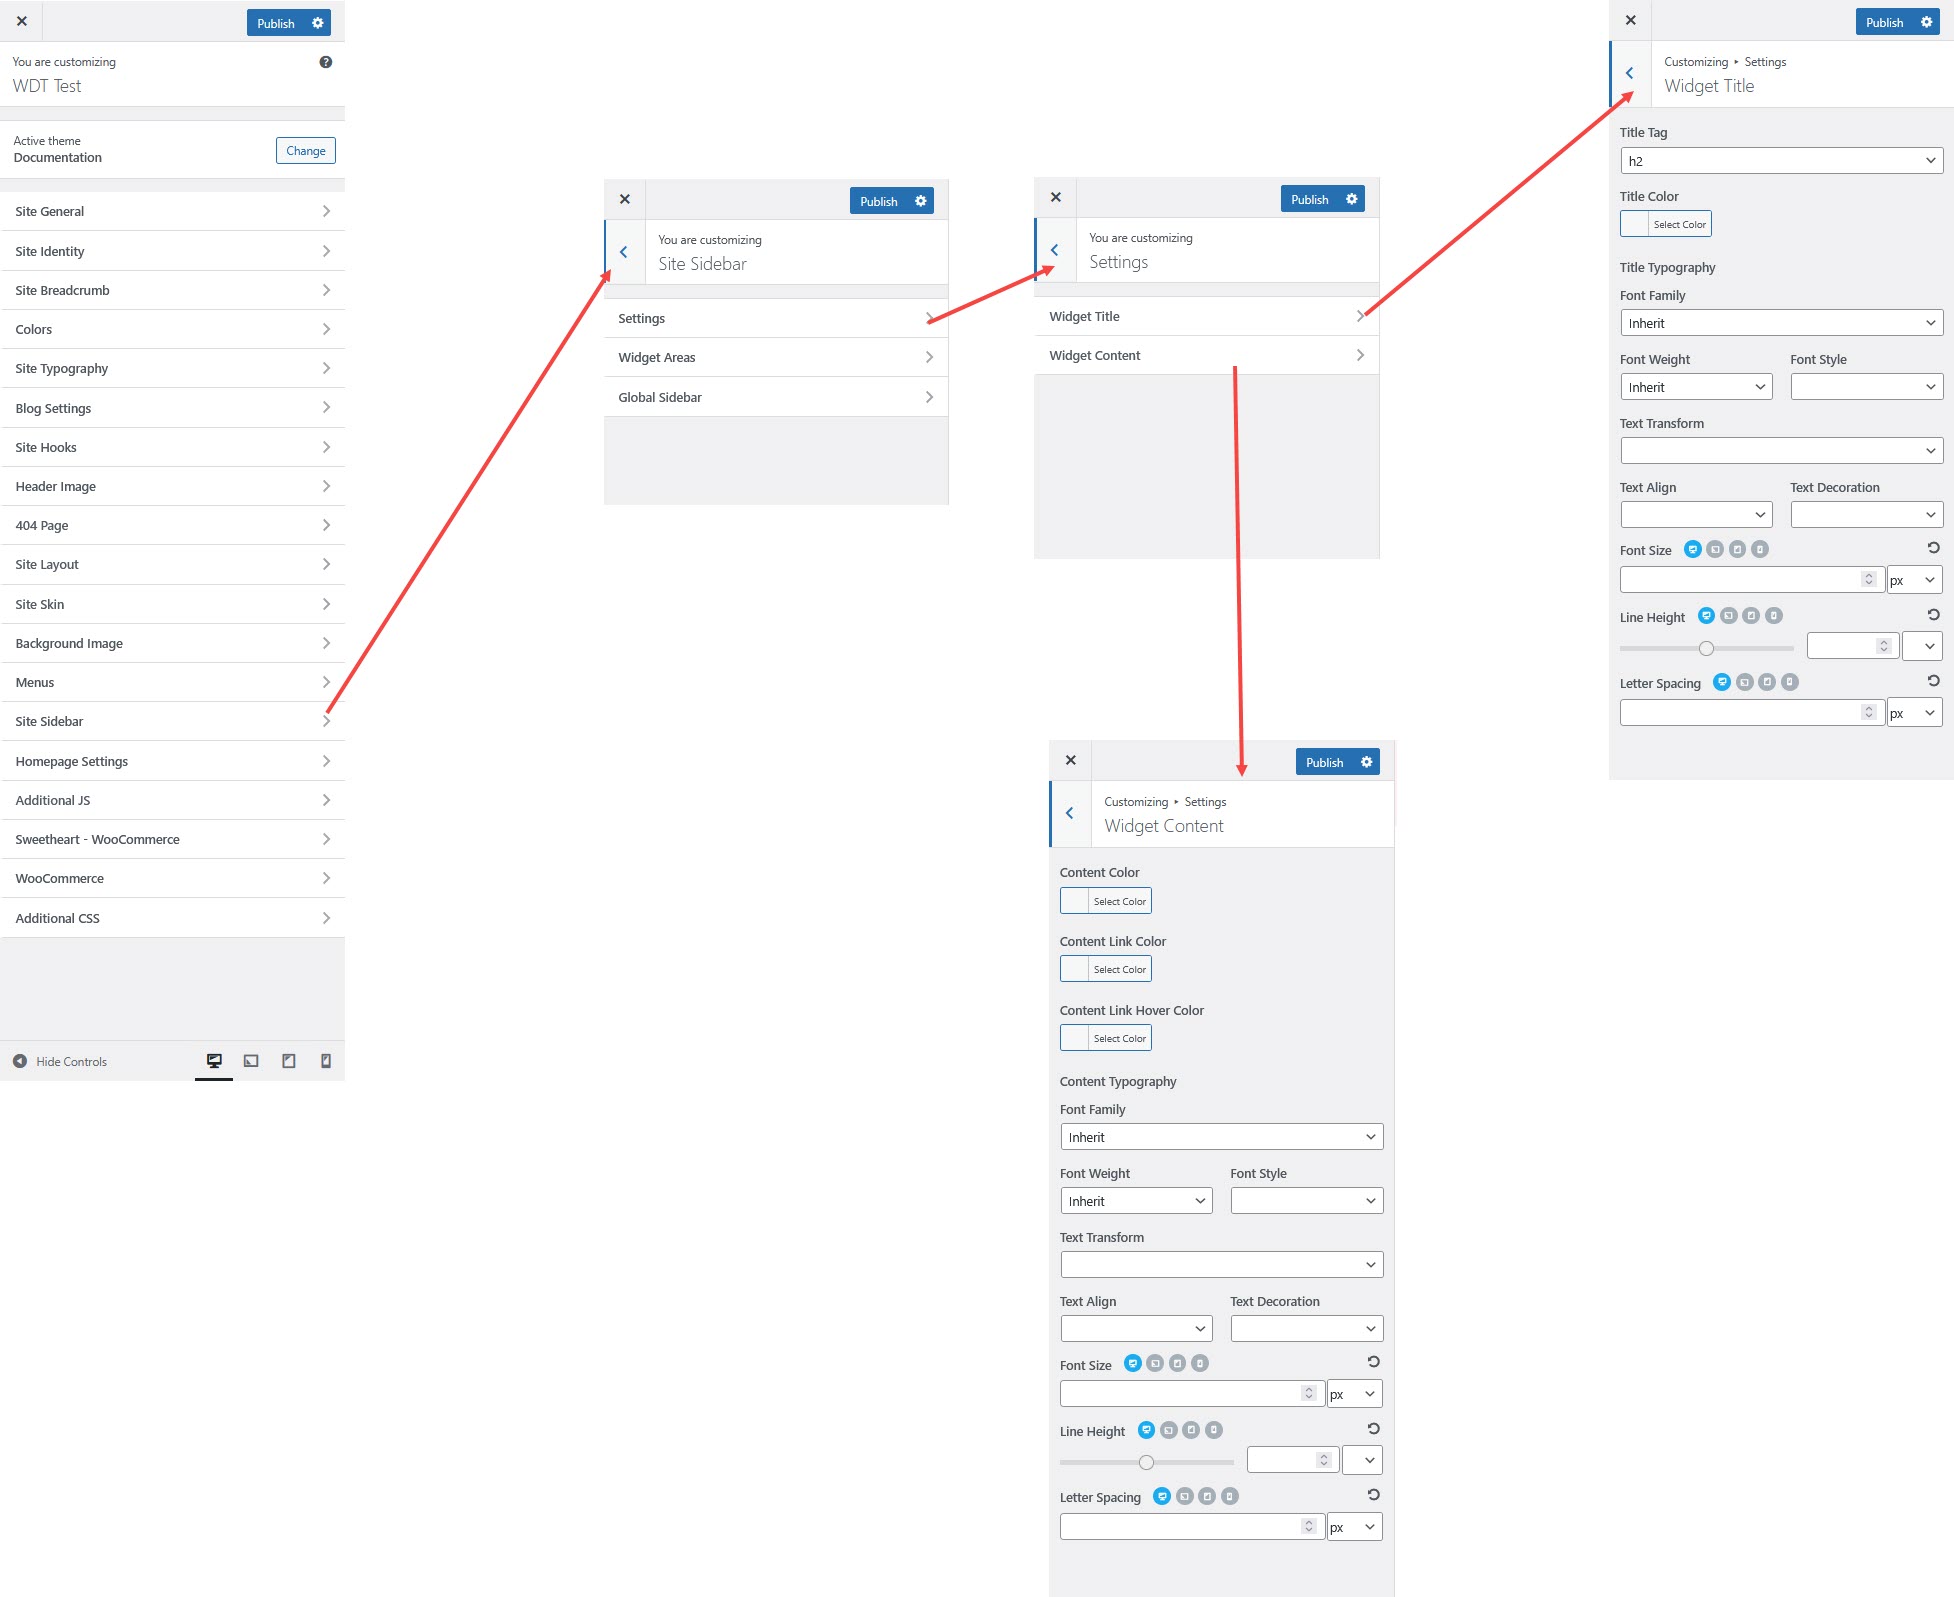
Widget Title & Content Styling
Widget Title – Customize the font, size, and color of widget titles.
Widget Content – Modify the text style, color, and spacing for better readability.
Assigning the Sidebar to Specific Pages
Navigate to dashboard > Pages → Edit Page
Locate Sidebar Settings in the page options
Select Admin Option, Without Sidebar, Left Sidebar, Right Sidebar
Click Update to apply changes

Adding and Managing Widgets
Go to Appearance → Widgets
Select Global Sidebar
Click Add Widget and choose the desired widgets
Drag and arrange them as needed
Click Save & Publish