Site Breadcrumb
Breadcrumbs are secondary navigation that shows the user's path in a hierarchical manner, enhancing the user experience, especially on large websites with extensive content.
Here's how you can configure the Site Breadcrumb in WordPress:
Here's a short form of the Site Breadcrumb settings process in WordPress:
Step 1 : Login to your WordPress admin dashboard.
Step 2 : Go to Appearance > Customize.
Step 3 : Select Site Breadcrumb.
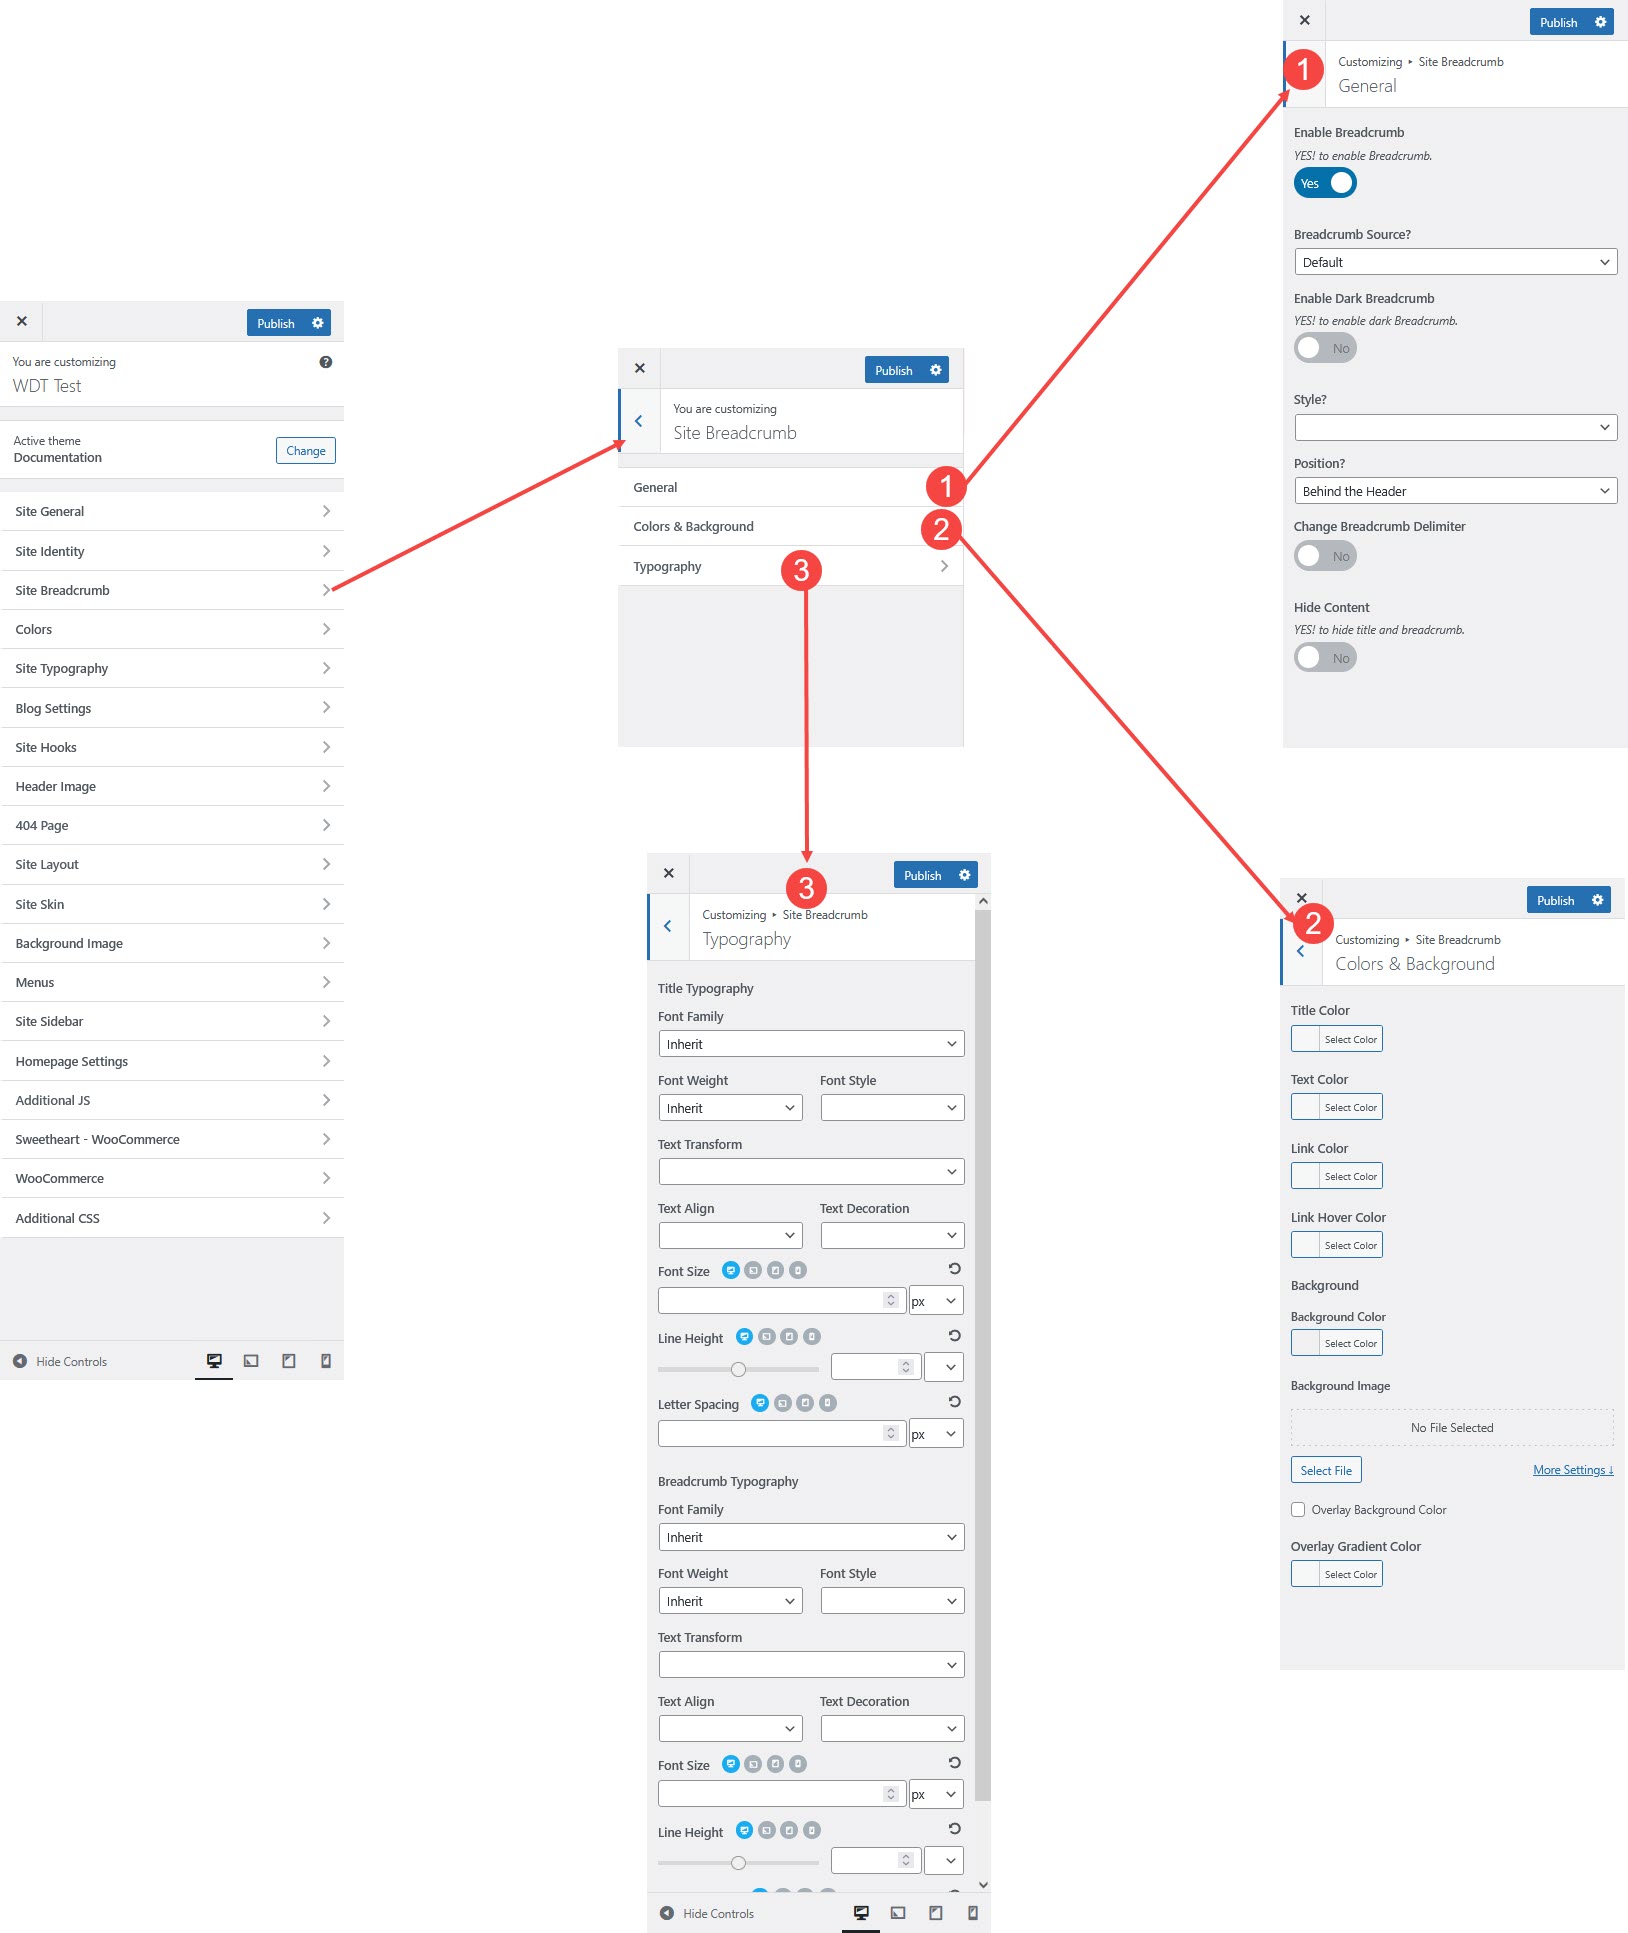
Step 1: General Options
Go to Appearance → Customize → Site Breadcrumb → General.
Configure the following settings:
Enable Breadcrumb → YES (to display breadcrumbs).
Breadcrumb Source → Default.
Enable Dark Breadcrumb → YES (to use a dark style).
Style → Align: Center, Left, Right, etc., as per your requirement.
Position → Behind the Header.
Change Breadcrumb Delimiter → Adjust the separator.
Hide Content → YES (to hide title and breadcrumb).
Step 2: Colors & Background
Navigate to Site Breadcrumb → Colors & Background.
Customize breadcrumb appearance:
Title Color, Text Color, Link Color, Link Hover Color → Choose colors.
Background Color → Set a background color.
Background Image → Upload or remove an image.
Background Size → Choose Cover, Contain, or Auto.
Background Attachment → Set to Inherit, Scroll, or Fixed.
Overlay Background & Gradient Color → Select colors if needed.
Step 3: Typography
Go to Site Breadcrumb → Typography.
Adjust text settings for Title & Breadcrumb Typography:
Font Family → Choose or Inherit from theme.
Font Weight, Font Style, Text Transform, Text Align, Text Decoration → Customize as needed.
Font Size, Line Height, Letter Spacing → Set appropriate values.
Step 4: Save Changes
Click Publish to apply all customizations.